Manage credentials
About This Guide#
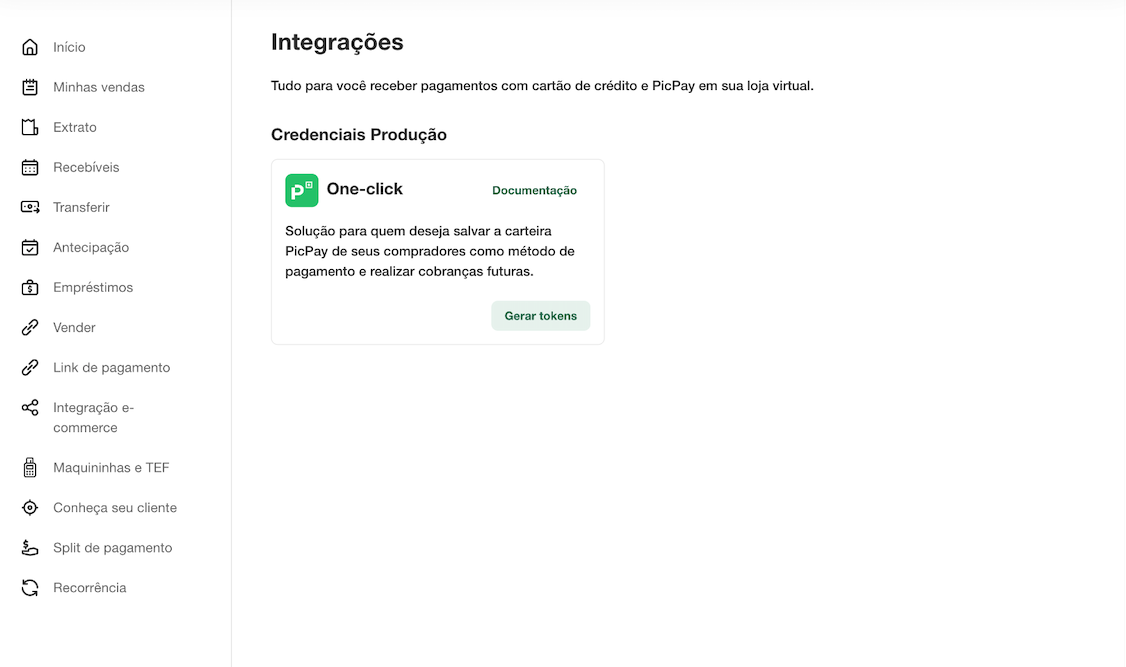
This guide explains how to manage credentials for use with the One Click service via the Merchant Dashboard.
Prerequisites#
Before starting, you need to have a PicPay account to integrate with the One Click product. This will enable you to log in to the Merchant Panel and generate or update your tokens.
Information
To create a credential in the panel for the first time, you need to configure some essential information, as described below. Once created, this information can be updated whenever necessary.
Flow Types#
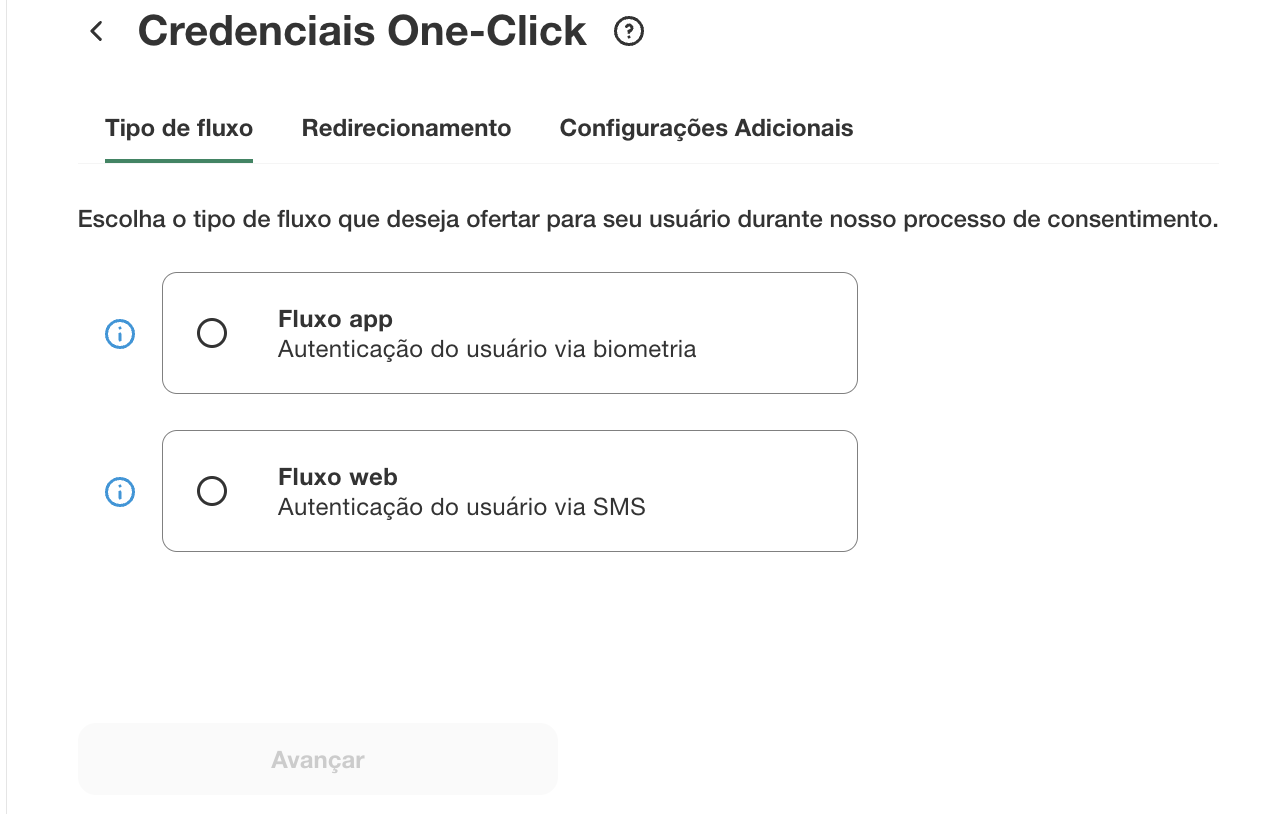
When integrating your application with the One Click service via the Merchant Panel, you must choose between two types of flows: Web or App. This choice is final and will apply to the entire account, meaning you cannot switch between flows after making the initial decision.
Attention
If your application includes any step of the authorization or consent process performed on a web page, you must choose the Web Flow. The App Flow is incompatible with experiences involving web interfaces.
App Flow#
In this flow, the user completes authentication and consent directly within the PicPay app.
- Uses biometrics whenever possible, removing the need for two-factor authentication.
- Allows the user to select the desired payment method during authorization.
Web Flow#
In this flow, the user completes authentication and consent on a web page, authenticating with their PicPay account.
- Requires two-factor authentication for increased security.
- Does not support biometrics.
- The user cannot select a payment method during the process.
Redirection#
After choosing a flow, you will need to configure the redirection URLs.
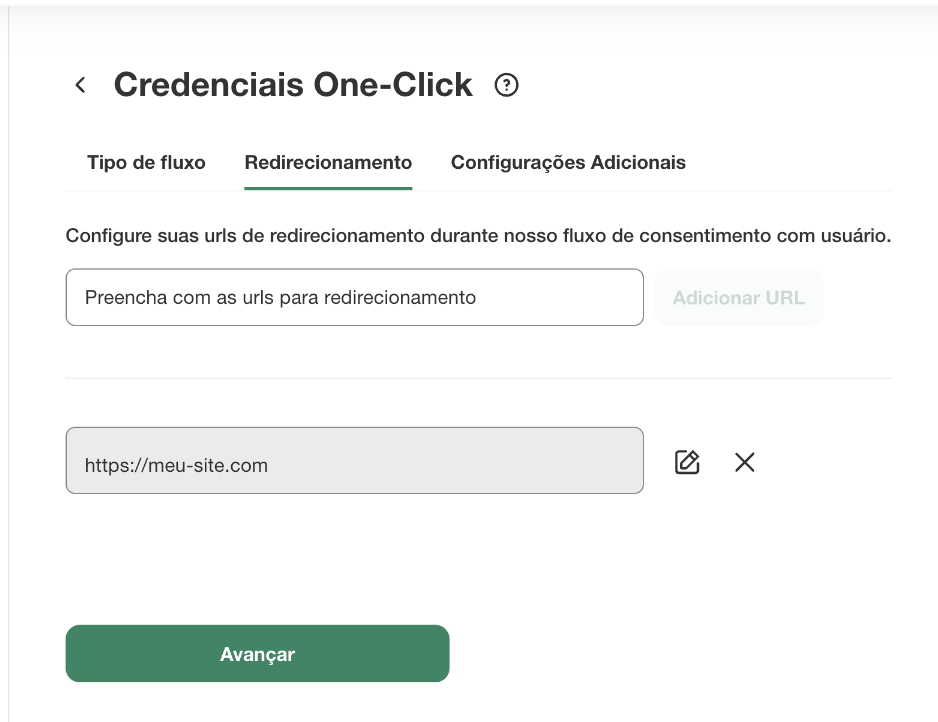
The redirection URLs defined during registration must match those used in the redirect_uri parameter when constructing the URL for the authentication flow. This URL will be validated when the user initiates the authentication and consent process. Validation ensures that the generated authorization_code is sent to a secure and reliable destination, protecting client data and preventing fraud.
Additional Configurations#
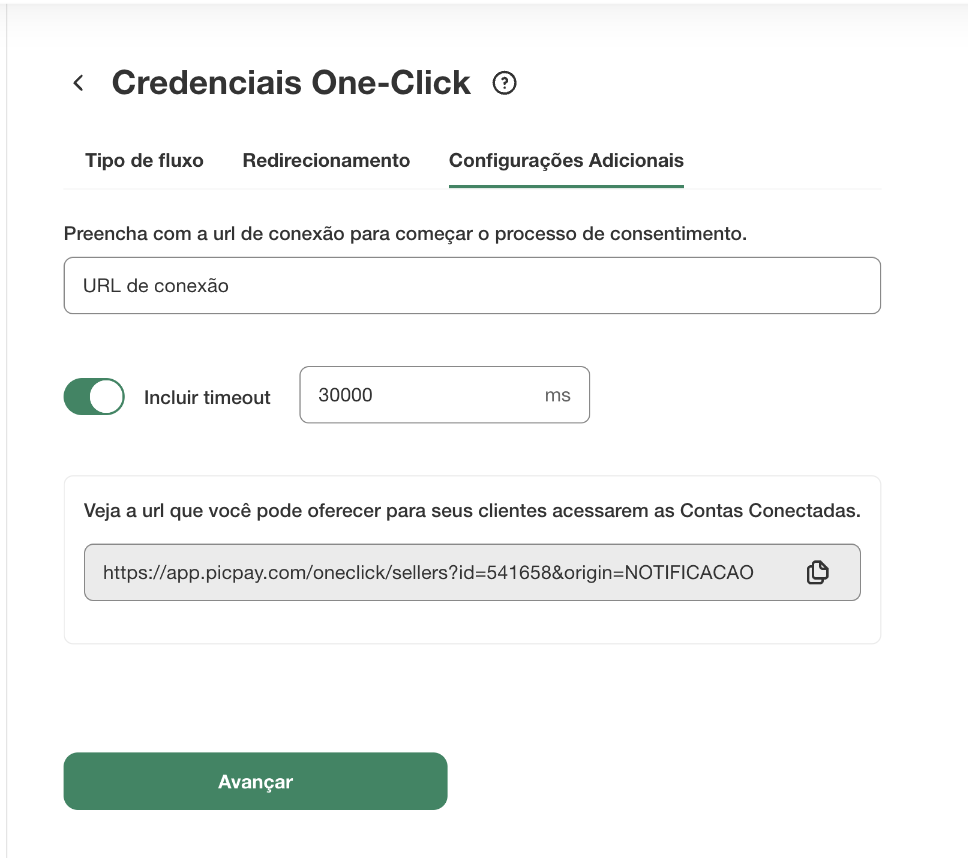
At this stage, you will need to define some additional important settings for creating your credentials. Below, we explain each setting and its purpose in detail.
Connection URL#
This URL directs clients who, upon accessing the PicPay app and exploring the partner listing, wish to connect with your application. Configuring it determines the destination where the client will be redirected to begin the authorization and consent process.
Timeout#
The timeout defines how long your application will wait for a response from the One Click service during the payment process. By default, this value is set to 30 seconds but can be customized as needed.
Attention
Setting an appropriate timeout is crucial to ensure a smooth customer experience and transaction approval within the expected time. If the transaction is approved after the configured waiting time, it will be automatically refunded. Learn more here.
Redirection URL for the PicPay App#
This URL is a specific deeplink for the PicPay app that can be copied and used to redirect users directly to the partner details page in the app. On this page, users can manage their payment methods and revoke consent securely through the PicPay app.
Updating Information#
Once your credentials have been generated, you can update them anytime using the Update Information button.
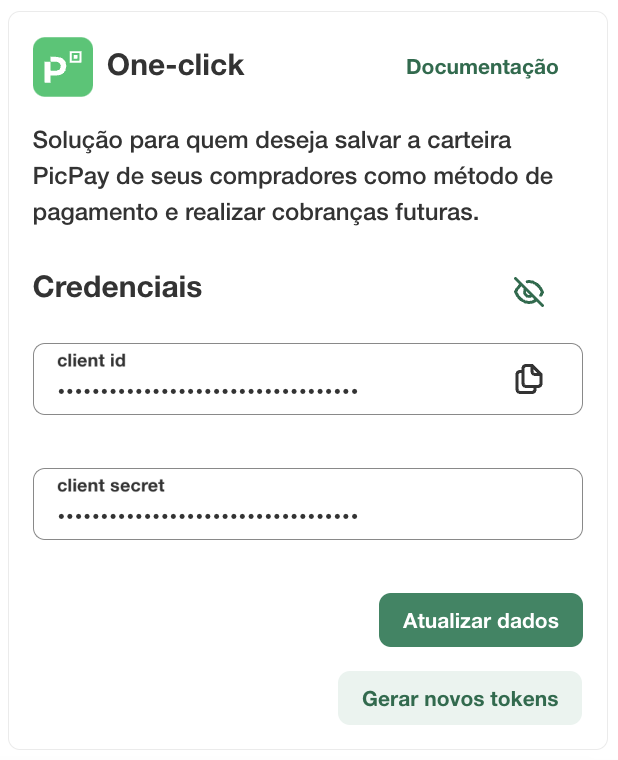
Clicking on Update Information allows you to modify current details and enables the option to appear in the user listing.
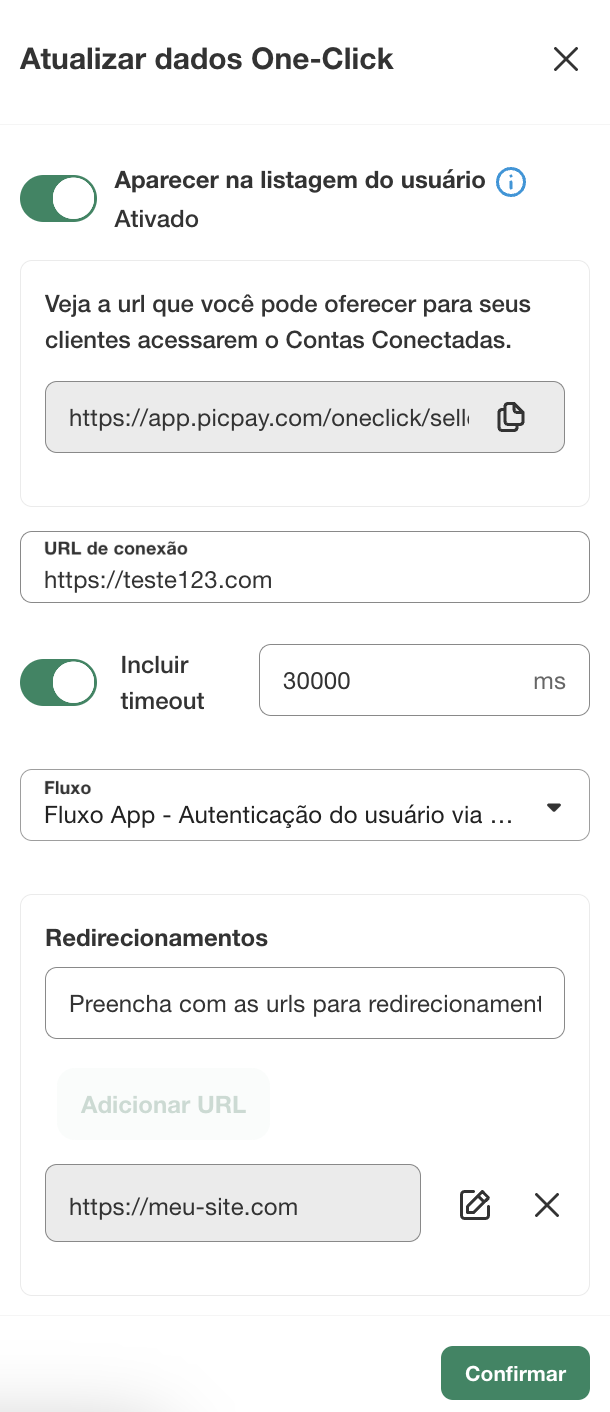
Visibility in the PicPay App#
Once your integration is ready to accept new client connections, you can choose to display your application in the partner list within the PicPay app using the appear in user listing option.
This way, when a client accesses the partner list in the PicPay app, they can start authentication and consent with your application.
Information
Clients already connected will always see your application in the connected partners section of the PicPay app, even if it is not visible in the public listing.
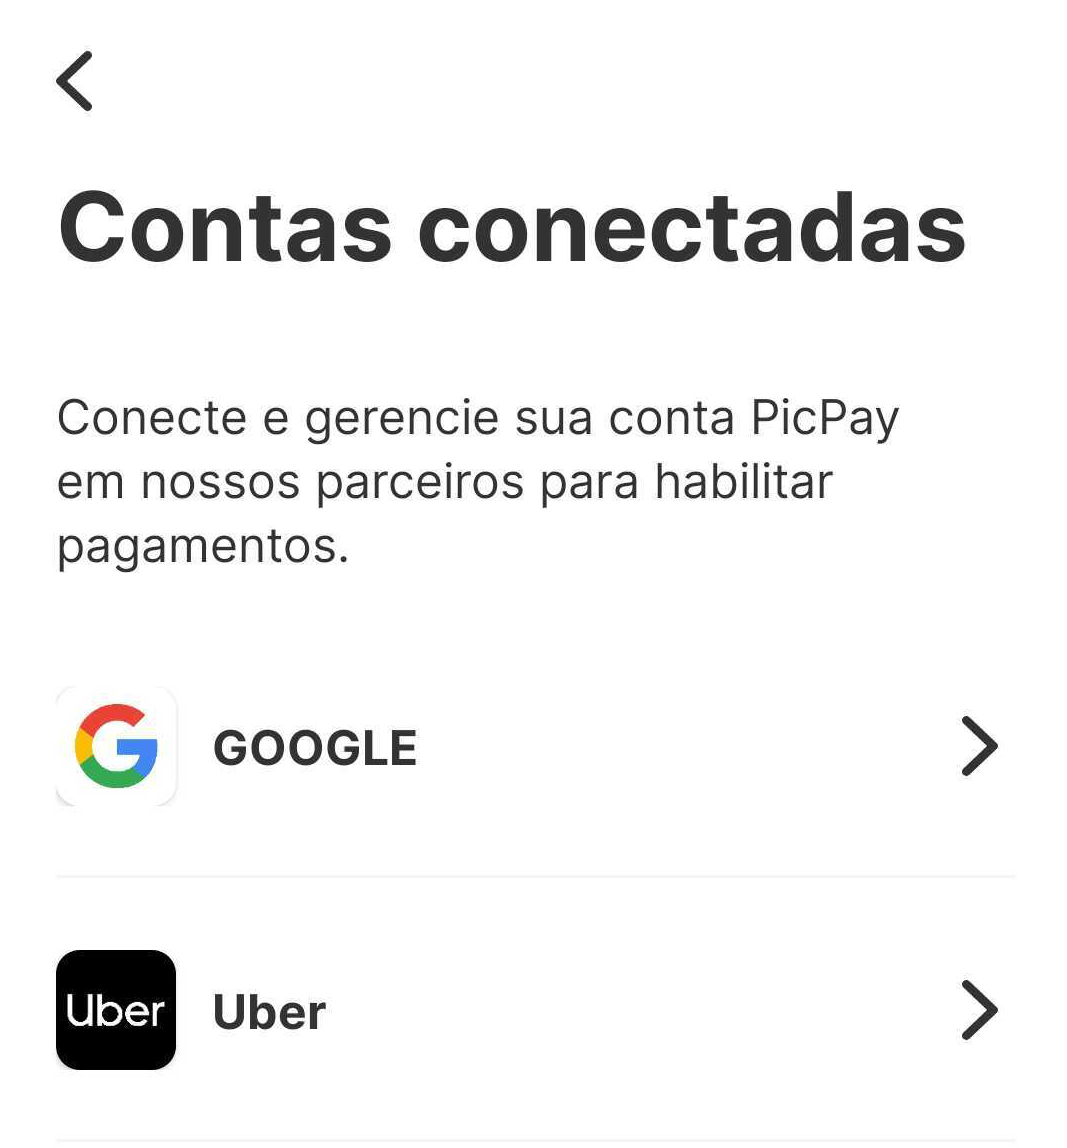
Example of the user view when accessing the partner listing in the PicPay app
Information
Through the partner listing in the PicPay app, clients can view and manage connections with partner applications, as well as revoke consent and update payment methods at any time.
Next Steps#
With a valid client_id and client_secret, your application will be able to generate a valid access_token. Check out the next steps below:
Getting Help#
We hope this article was helpful! If you have any further questions, you can check our FAQ or contact us at pic.premium@atendimento.picpay.com.